Repairing my 944 tail lights – Tail light fuse late 944

After my last trip to AMP for track night, I ended up having to drive my race car home due to a tow vehicle failure.

Jeep Performance Improvement Ideas
Repairing my 944 tail lights – Tail light fuse late 944
After my last trip to AMP for track night, I ended up having to drive my race car home due to a tow vehicle failure.
No start but not a starter problem
Our 99 XJ Cherokee was stranded in the middle of the driveway when I can home yesterday. Turning the key made the solenoid click but did not engage the starter motor.
The battery voltage was fine so I assumed the starter had failed. I tried the normal hammer tapping method but still got no start.
I had to pull the starter in the driveway. With it off, I took it to the shop to test. It tested fine. I was puzzled so I reinstalled it on the Jeep.
Still the solenoid would click but not starter motor activity.
I then checked the voltage at the wires and they both had 12 V.
I then wiggled the cables at the battery and tried again. This time it started up fine. Somehow the crimp of the wire that leads from the battery to the starter had corroded and would show voltage but not transfer any current to run the motor.
I used vise grips to recrimp the connector and the Jeep started up just fine. Hopefully, it will continue to
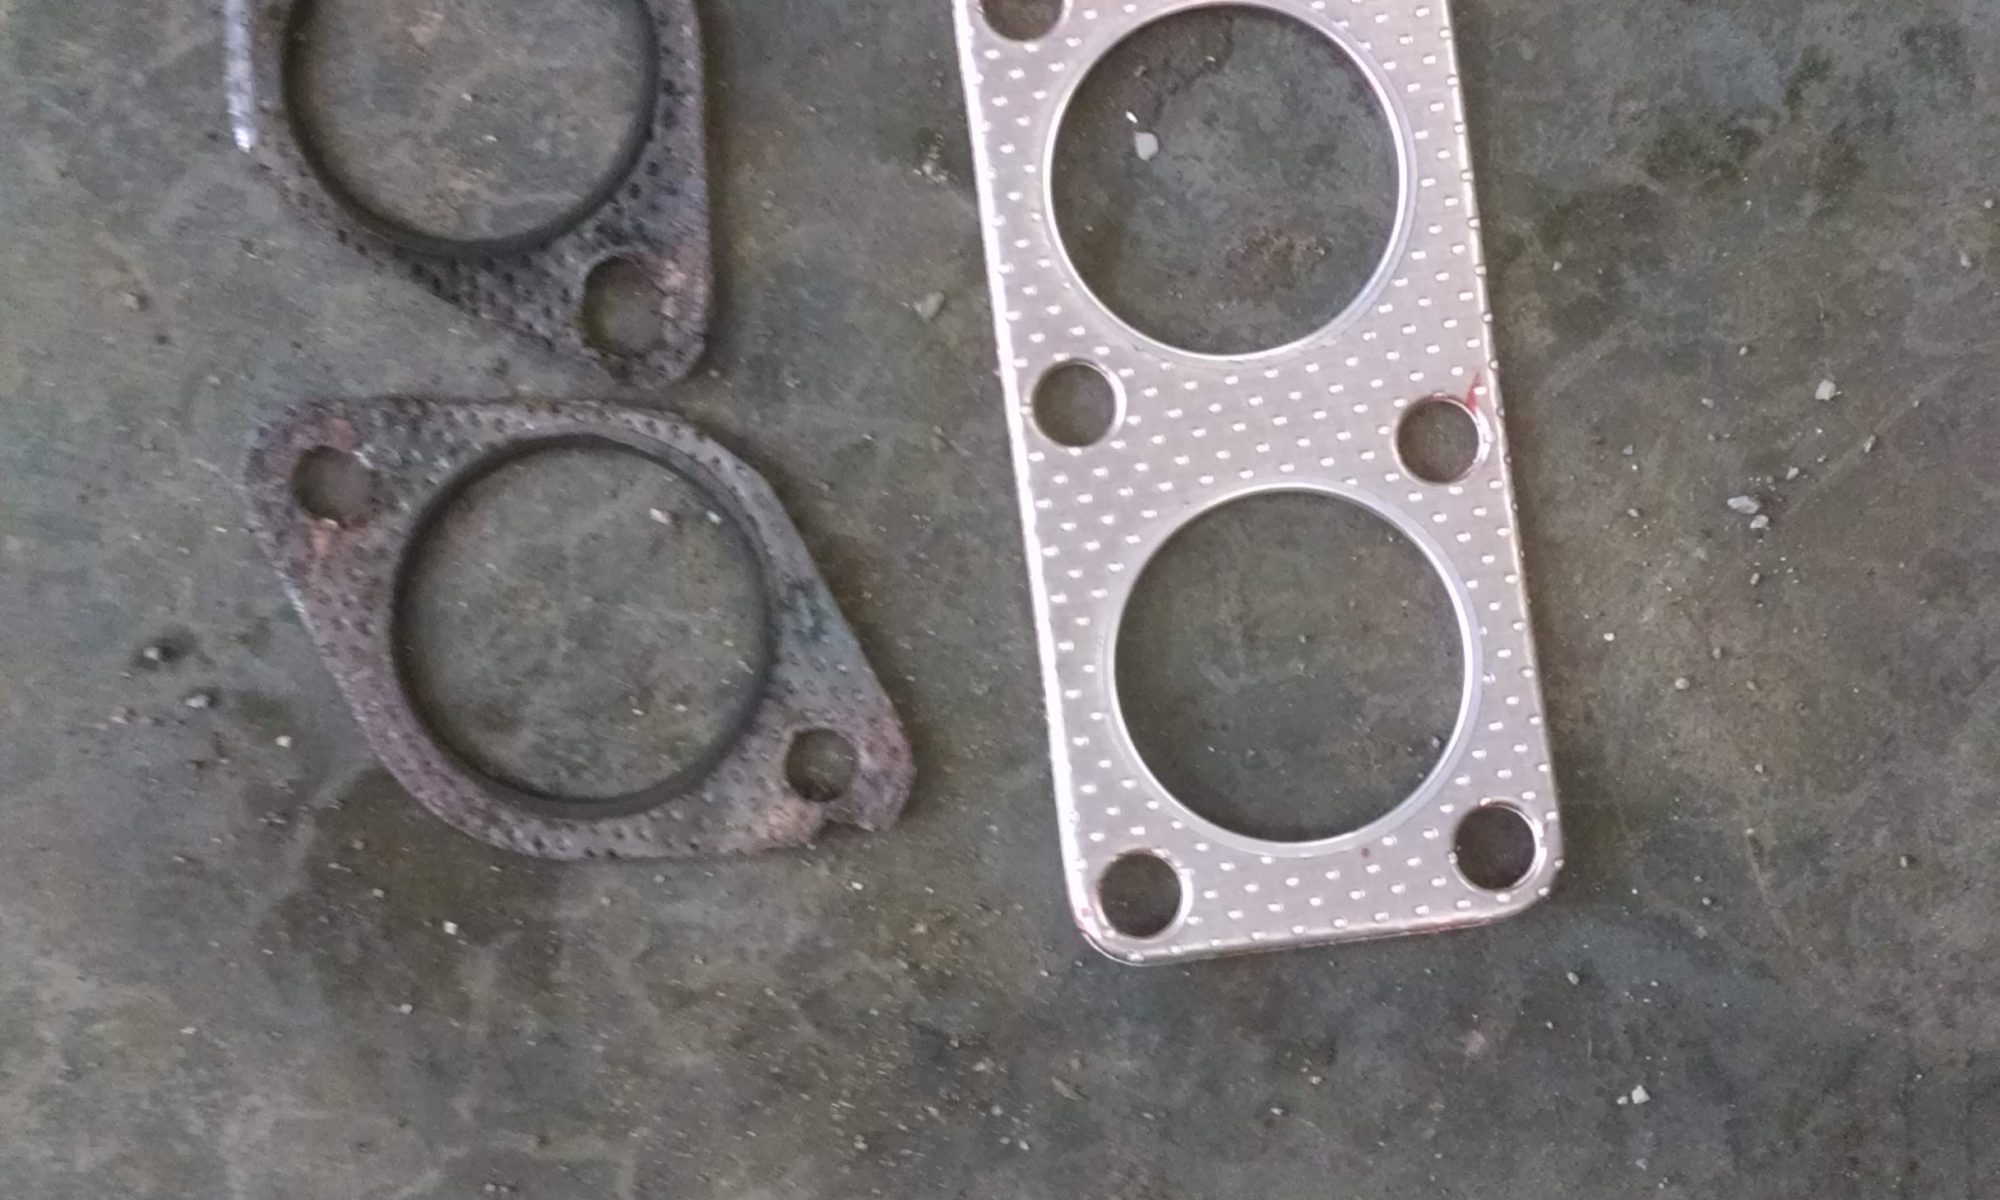
Replacing the exhaust flange gasket on RX7
Our newly acquired RX7 track car has had a small exhaust leak under the car. I suspected this was contributing to the huge backfire I got every time I went into turn 1 at Atlanta Motorsports Park. (Update: this turned out to not be the case.) Continue reading “RX7 exhaust flange gasket”
After a hack and Godaddy loosing all the pictures, I lost interest in maintaining this blog. I have been able to recover the text so the helpful information is still here.
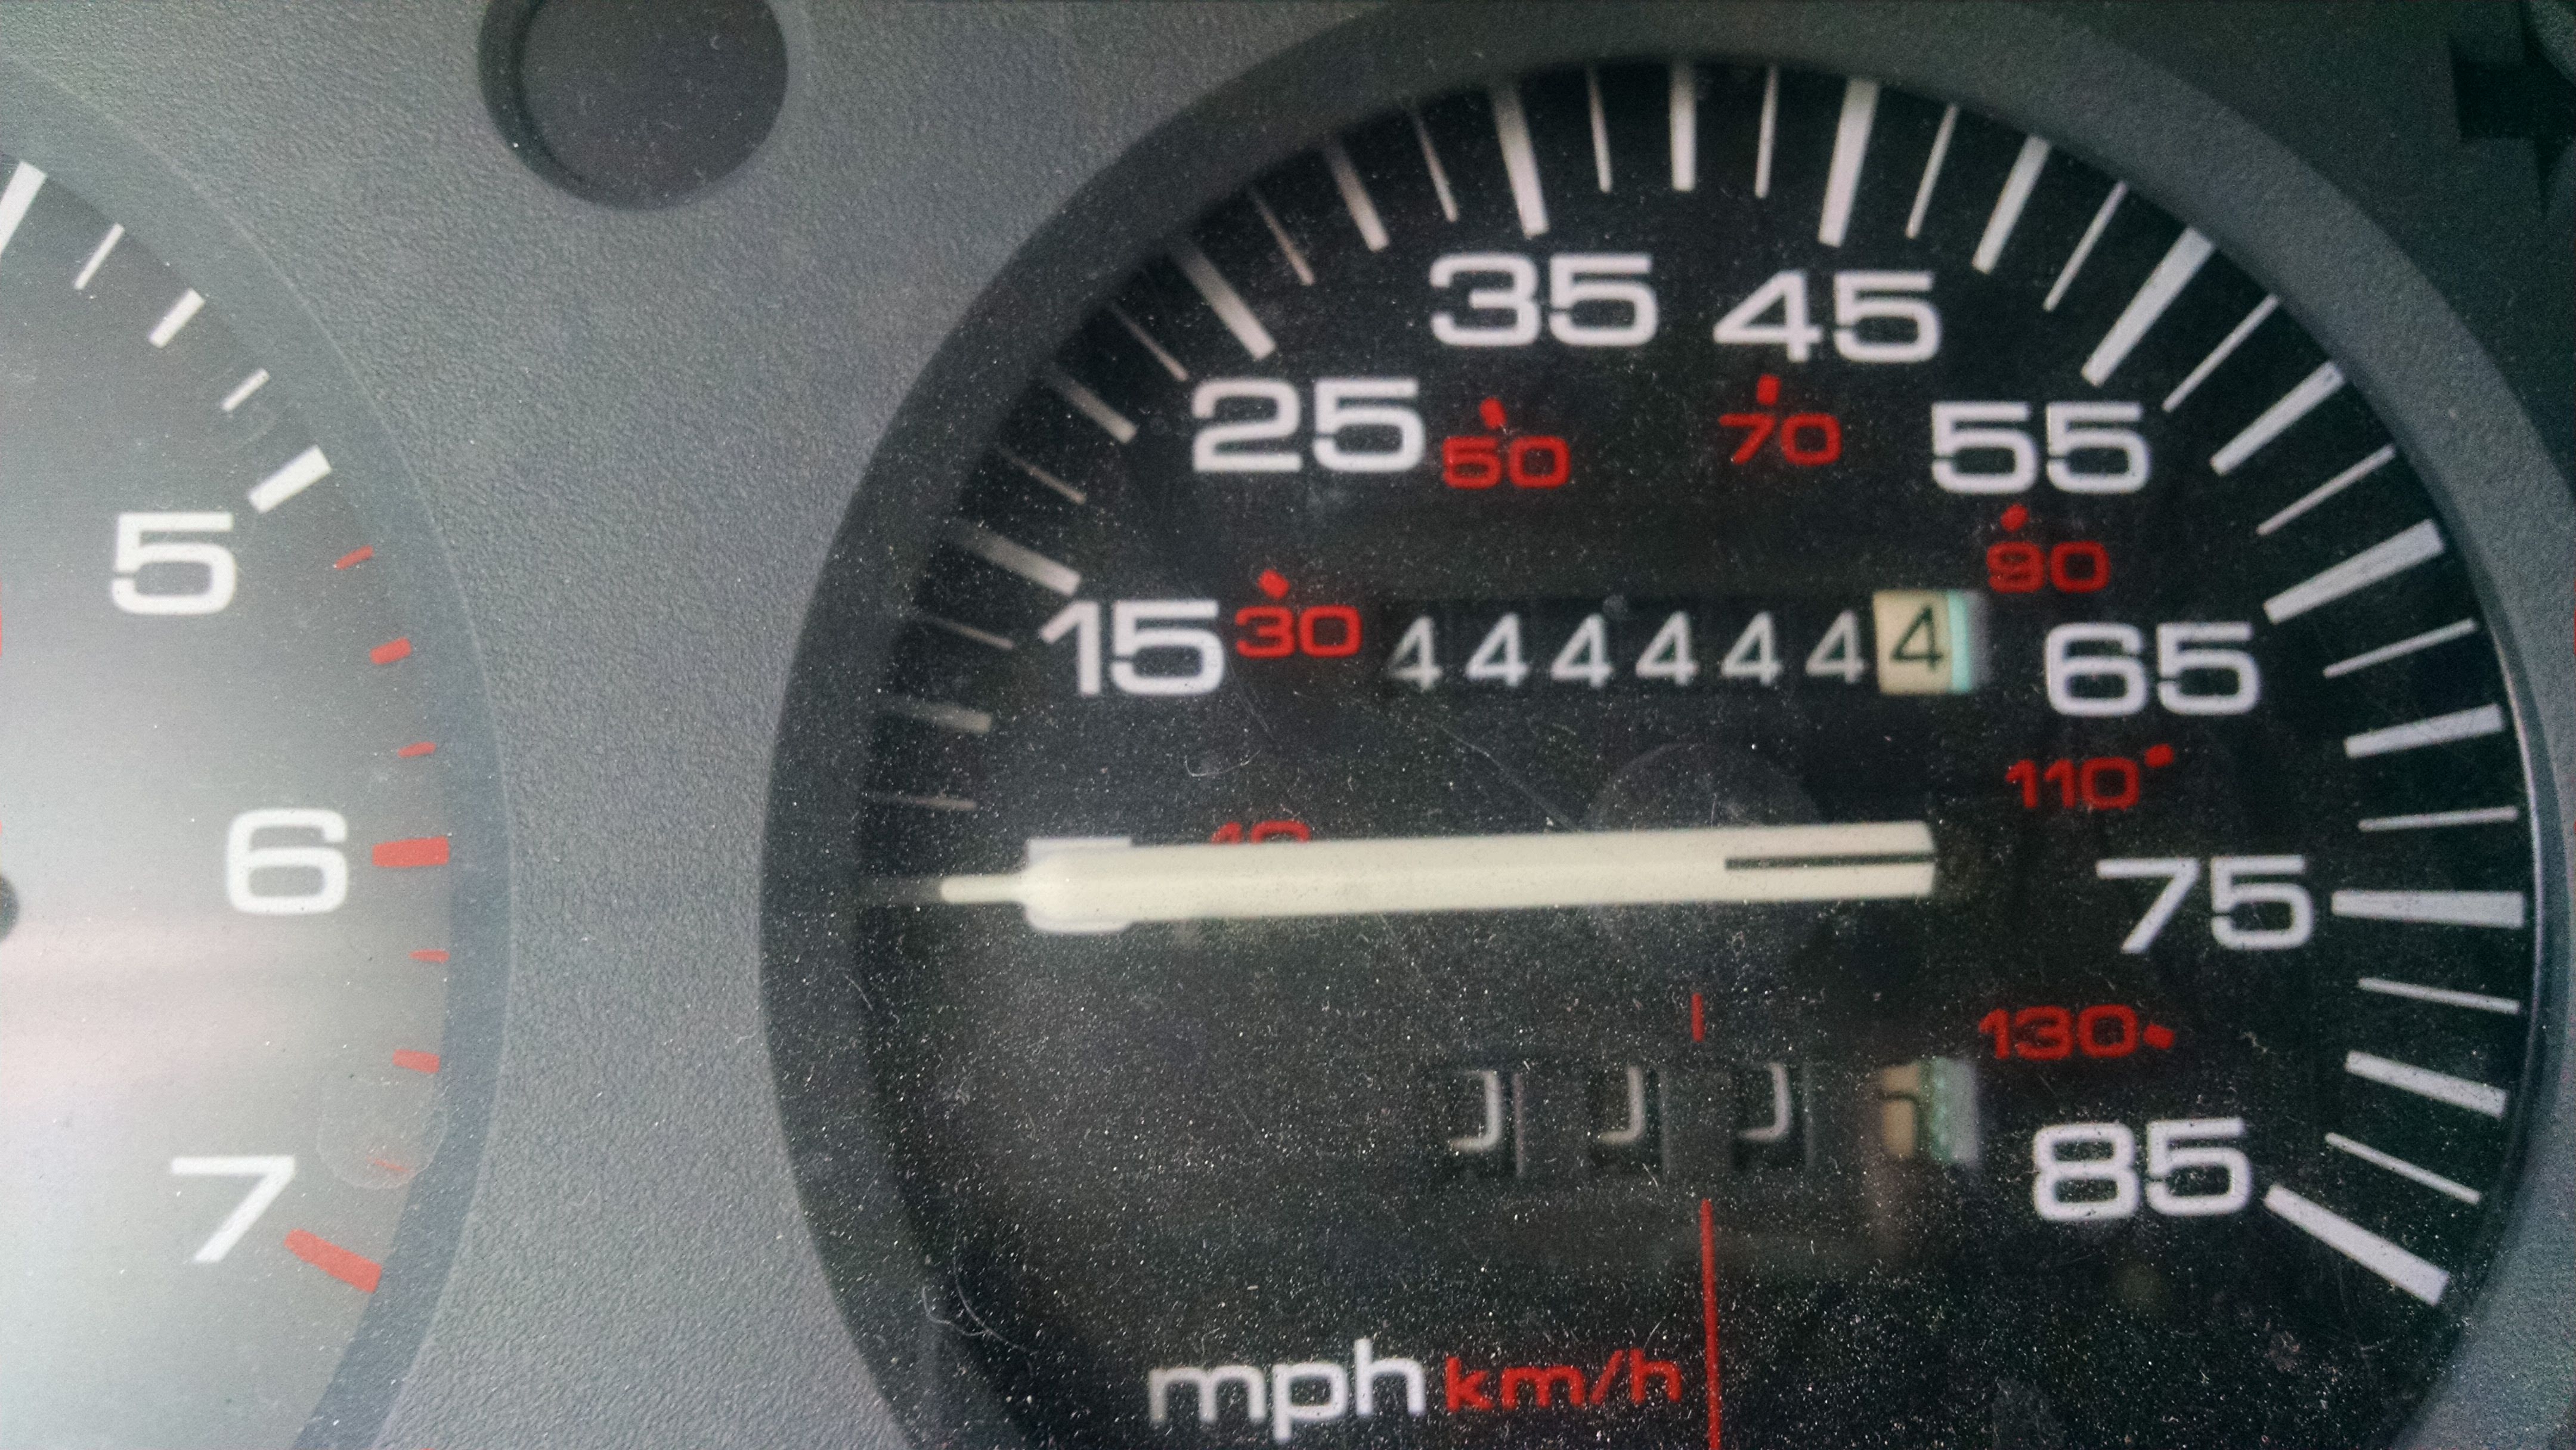
In celebration of my White Jeep making 444444.4 miles:
I am going to give the blog another go with new information and new photos along the way.
Hope you enjoy the ride. Since the goal of this blog is to help support the Jeep and racing habit, there will be ads and affiliate links. Please support the advertisers to keep this blog alive.
At our last race at Road Atlanta the driver in the final stint mentioned he saw a red light flash on the dash occasionally but did not know what it was. A routine oil level check showed the oil level had gotten very low by the end of the race. Therefore I decided we needed to inspect the rod bearings. And I am glad we did.
I used info from Clark’s Garage to establish a procedure. I began by purchasing an engine support from Harbor Freight. Then with the car on the lift, I removed the rear control arm bolts, the ball joint pinch bolts, the front sway bar and then lowered the cross member out of the car. It turned out to be much easier than it sounded form reading the instructions.
With the engine supported form above and the cross member out of the way, the 22 bolts holding the pan in place were easy to access. The pan separated easily but it would not drop down. The internal plastic baffle hung on the oil pickup. I ended up breaking the baffle before I figured out he right twist to get the pickup to come out the hole.
With the pan down, I had full access to the rod ends. Knowing number two to be a problem I started with that one. The Babbitt was gone as well as much of the copper. There was copper embedded in the crank throw as well. I thought we were looking at a complete rebuild. However the other three bearings looked fine.
So I decided to try polishing number two in place. I watched several you tube videos on crank polishing before I chose a method. I ended up wrapping a strip of 600 grit sandpaper around the journal and used a string to spin it back and forth. I lubricated it all with WD 40 during the process. In no time at all I had a shiny smooth journal that measured in the middle of the range.
I then installed new bearing in all four positions using new rod nuts as recommended. on reassembly, I notice the strap that holds the two sump tubes together was broken so I took time to weld it back together.
I was not able to source a used baffle in time so I decide to just glue together the crack I caused in the existing one. With it out of the oil pan, I made several practice runs to get the twist right on re installation.
Putting the oil pan back in place was the most challenging part of the whole process. The gasket is very thick and needs to be compressed just to get the bolts to start. I used wire ties threaded through the holes to keep it lined up while I made the twists to get the pan in place. Then I used my under lift support to lightly press the pan up while I started the bolts. I then used my inch pound torque wrench to set all the bolts to 36 inch pounds. This took forever to get the m all down as the gasket continued to compress causing the bolts to loosen as the one next to it was tightened. I hope I figure out a better method next time I do this job. Once they we all at 36 I then put them all to 72 inch pounds. This step went much quicker.
Once the pan was back on, I lifted the cross member back up and reattached all the under car stuff. I installed a new oil filter and refilled with fresh oil.
We are now ready to race at NCM. I will do this all over again after that race to see how much wear is on a fresh bearing set. Since these bearings were in place when we bough the car, I have no idea of their age or history.


