Replacing the Idle Air Controller on a Mazda MPV

Replacing the Idle Air Controller on a Mazda MPV

The idle speed on most modern fuel injected engines is controlled by an idle air control valve. This valve is controlled by the ECU and allows air to bypass the throttle body to maintain the idle speed.

The Idle Air controller on the Mazda MPV is located on the back of the intake manifold. It is held in place by two 10mm head bolts. Just remove the bolts and the old valve can be removed. It is easier to disconnect the wiring harness after the valve is off the manifold.

Install a new gasket and attach the wire to the replacement valve. Bolt the new valve down and you are done.

Start the engine and test the idle speed. The computer may take a moment to adjust to the new valve but the idle should smooth out and now be controlled ending embarrassing and dangerous stalls.

AW4 Troubleshooting

AW4 Troubleshooting
Diagnosis of faults in the Jeep AW4 transmission.

The automatic transmission used in the Jeep XJ Cherokee is nearly bullet proof. Seldom does it ever give trouble. Maybe that is why it is so hard to find good information on how to fix it when it occasionally does act up. The same transmission is used in 600hp turbo Supras so it can handle a lot of abuse.

To test if the trouble is electric or mechanical, pull the fuse to the TCU or disconnect the wiring harness. 1-2 will give first gear only, 3 will give third gear. D will give forth gear. The torque converter will not lock manually. You can drive the Jeep just fine this way until you figure out what is wrong.

If the transmission does not shift as described manually, then you have a serious problem and you need to get another transmission from the junkyard. Don’t buy a rebuilt one. If you have yours rebuilt make sure the shops knows how to handle the AW4. If you choose to rebuild it yourself, the FSM has lots of nice pictures.

Most of the time the trouble will be associated with the Transmission Control Unit or TCU. It is handy to have a spare for trouble shooting although the computer itself rarely goes bad.

A transmission control unit located under the passenger side panel under the glove box controls the AW4. The panel is one piece all the way across and there are more control boxes on the driver side so be careful when you remove it.

There are two controllers that I know about. The 1990 and earlier use a different one from the 1991 and up. Somewhere along the way they combined the TCU and the ECU but I don’t know what year that was. The 1991 and up unit has a green connector. It is not interchangeable with the earlier unit.

The TCU gets inputs from a speed sensor, the Throttle Position Sensor, the brake pedal, the battery and the ignition switch. Some models also have a power / comfort switch.

The only outputs control three solenoids. One controls the torque converter lockup and the other two select the four gears in a binary fashion.

First Gear S1 on S2 off
Second Gear S1 on S2 on
Third Gear S1 off S2 on
Forth Gear S1 off S2 off

As you can see, if the TCU has no power, you will get forth gear in D position. Also with the TCU off, 3 will give you third gear and 1-2 will give 1st gear. You can’t get 2nd manually.

The wires on the 1991 and up TCU are connected as follows:

C3 Speed Sensor Tan
C8 NSS 1-2 Light blue
C9 NSS D Green
C10 Brake switch Light Blue/ yellow
C11 Power switch Tan
C14 Torque Converter White
C15 Solenoid 2 Violet
C16 Solenoid 1 Blue
D7 Ground Black
D14 Battery Red
D16 Ignition Yellow
D1 TPS+ Gray
D3 TPS- Tan / orange

Note that the wire colors and traces may be different on different years. Check your FSM wiring diagrams for the right colors for your Jeep. The pin position is the same on all the TCUs however.

If the speed sensor signal is bad, the controller will force the transmission to stay in first gear. It will not shift at all. Unplugging the controller will give manual operation. This speed sensor is mounted in the side of the transmission under the transfer case shift linkage if you have 4wd. Don’t confuse it with the speedometer sensor in the transfer case.

The brake input is used to unlock the torque converter. The 1990 and earlier used +12 to lock and zero to unlock. The 1991 and up is the opposite.

The TPS voltage should read about .5 volts with the throttle closed and 4.5 volts with it open. It should transition smoothly between the two numbers. It seems to work fine even if the voltage is a little off.

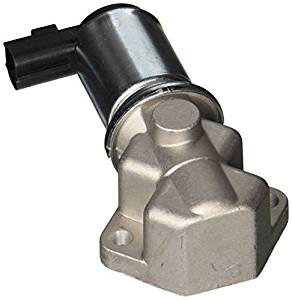
The solenoids are located inside the transmission. They get power from the TCU. You can monitor the voltage to see if they are getting power at the right times. You can also add a power wire and switch to juice up solenoid 2 to get second gear when in the 1-2 position. This gives you control of 2nd gear which is hard to come by any other way.

You can check the solenoids by testing the resistance across the coils. Attach one side of your meter to the battery ground. Good grounds are hard to come by inside the Jeep. Connect the other side to each wire going to the solenoid. They should read around 15 ohms give or take a couple. They seem to read different warm than cold but will be in the teens if good.

The solenoids are expensive and require dropping the pan to change. Make sure you have eliminated other possibilities before swapping one.

Contrary to most wiring diagrams I have seen, the solenoids do not ground through the black wire. They ground to the transmission case. So if you are having trouble with a solenoid energizing, make sure it is properly grounded to the case and the case is properly grounded to the battery before swapping it out.

The speed sensor uses the black wire. If either the black wire or the white wire are damaged in the transmission wiring harness, the transmission may hang in first gear. The harness passes right behind the transfer case shift linkage and can be damaged by the linkage if it is moved around by a transfer case drop or something like that.

Normally, the transmission with switch to 2nd at 20 to 25 mph depending on the TPS signal. It gets its speed reference from the internal speed sensor so if you are in low range, the speed will be different.

In the 1-2 position, the torque converter can lock up in first or second gear. In 3 or D it will only lock in 3 or four. The normal sequence is to shift to second, and then third, then forth and then the torque converter will lock up giving an engine speed of about 2700 RPM at 55 MPH.

Armed with this information, you could be able to sort through nearly any fault in the AW4. The FSM is most unhelpful in that it calls for a DRBII scanner that seems to be unavailable at any price these days. Even if you had one the TCU only gives a few codes that are really not very helpful. You will probably still have to sort through each of the inputs and outputs to find out what is really wrong and get it working again.

Bad Ball Joints Again.

Bad Ball Joints Again.

After breaking a second axle U joint in just a few months time, I had to see what was wrong. While I still don’t really understand why, I know from experience that if the ball joints are loose, the U joints will break.

As I was putting the hub back in after changing the axle shaft, I saw the ball joint move. There should be zero up and down motion in the ball joints. They should only pivot. Mine was moving up and down almost a quarter of an inch. I knew this was trouble so I removed the axle shaft and replaced it with a 2wd stub shaft to wait until new ball joints arrived.

With the new ball joints in hand, I set about removing the old ones. They have only been in pace a couple of years or so. I followed the same procedure I have documented before in: Ball Joint Replacement.

When I went to separate the knuckle from the ball joints, the lower joint split and part came out with the knuckle and part stayed in the axle. I had found my problem. I am still not sure if it was a bad part or was not lubricated properly.

I pressed in the new ball joints using the same procedure described in: Ball Joint Replacement. To reduce stress on my press, I used a hammer to strike the end of the press between turns on the bolts. This trick allowed the press to easily push in the new joints without bending the press as I have done in the past.

The hammer taps help to keep the ball joint aligned as it presses in and relieves and sticking as it moves through the axle. Hammering also helps in the removal process as well.

Dana 30 gears

Dana 30 gears

I finally completed the regear of Jennifer’s XJ the weekend. This has been a much longer project than I first expected.

She has had a gear set on her shelf for a few months now waiting for me to install it. However, we had to collect all the various parts needed. The first being a matching set for the rear. Once the rear gears were in, I finally proceeded to work on the front.

I began by stripping down the old gears. This swap involved going from the stock 3.55 gears to 4.10 ratios. There is a different carrier required for the 4.10 gears due to the thickness of the ring gear.

The first step was to move the spider gears from the old carrier to the new one. The ring gear had to be removed to provide clearance for the cross pin to be removed. The cross shaft is held in place by a roll pin that has to be driven out with a punch. My proper sized punch seems to be missing, so I used an old drill bit instead.

With the spider gears transferred, I then mounted the new ring gear on the carrier. I removed the bearings from the old carrier to retrieve the shims being careful to keep them on the correct sides. I took a set of slightly worn bearings and reamed out the inner race with my die grinder until they slipped on easily. I used these for the trial fits before installing the new bearings.

I pressed off the old pinion bearing to retrieve the slinger under it. I then heated the new bearing and slipped it onto the new pinion with the slinger under it. I noticed after it cooled that I could rotate the slinger slightly so I tapped it down tighter with a punch and hammer.

I used a punch to drive out the races from the housing. There is an oil baffle under the inner pinion bearing that will be destroyed in the removal process. We had some trouble locating a new baffle. Although they cost less than two dollars, no one in town had one in stock. Most 4×4 places wanted $8 to $16 to ship one. We finally found a place with reasonable shipping and bought two just in case.

One of my XJlist members gave me the tip to measure the oil baffle and replace it with a shim during the set up process. This keeps you from destroying more of these baffles while performing the set up tests. My baffle measured exactly 0.020 inches so I used a 20 thousandths shim in place of it during set up.

The pinion depth on the Dana 30 adjusts by shims under the bearing race in the housing. This means driving the race in and out until you get the shims right. I took and old outer pinion bearing and reamed it out so it would easily slip on an off during set up. I assembled the pinion with bearings and slingers but no preload shims. I snugged up the yoke nut to take out all end play.

I then set the carrier in place. I used a soft hammer to drive it into the housing rather than using a case spreader. I set the caps in place and tightened them down. I then coated some of the teeth with the yellow marking compound that came in the overhaul kit. I then rotated the assembly around to get a pinion depth pattern.

I had used the chart in the Jeep FSM to select the pinion shims. Basically each pinion gear is marked with its variance from zero depth. In this case the old gear was marked 2 and the new gear was marked 6. This meant I needed to remove 4 thousandths of shim from the shim pack under the bearing race. I measured the shims that came out and removed a 10 and added a 5 to make up close to 4 difference. I then added a 20 to substitute for the baffle.

I almost cheered when this shim pack gave a beautiful wipe pattern showing the contact patch right in the middle of the gear. I also found that the yellow gear marking compound which is actually made by GM makes a much better mark that the Prussian Blue I have used in the past.

I set up my dial indicator and verified the back lash. It was a bit hard to read the indicator but it was well within the .006 to .009 spec in the manual. That meant the same shims from under the old bearings would work.

I almost wished I had put the baffle in. I carefully drove out the race and replaced the shim with the baffle and reinstalled it.

I prepared to set the pinion preload with the new bearings. That is when I noticed that the rebuild kit contained the wrong outer pinion bearing. It was one for a low pinion Dana 30 rather than the XJ style high pinion. This difference has plagued this install from the beginning. (See the earlier posts.) I obtained a replacement from Advance Auto but not without some difficulty getting the right part even with the old bearing in hand.

I prepared a set of shims based on what had come off the old pinion. These proved to be way too tight. I then built a thicker stack of shims. These were too loose. The pinion preload is supposed to be between 20 and 40 inch pounds when installing new bearings. The preload is adjusted with shims on the XJ contrary to what the FSM says. Some Dana 30s use a crush sleeve like the Dana 35 but not this axle.

I then made up a shim pack that measured 55 thousandths. This was too tight, so I made one that measured 60 thousandths. This was just a bit too loose. Luckily, I do have an inch pound torque wrench so I could make accurate measurements. I would have been very frustrated if I were trying to use weights and a string as some forums recommend.

I came down to where 55 was too tight and 59 was too loose. I was not able to build a pack in between with the shims I had. I finally gave up a made it just a bit loose. I hammered in a new seal and made the final install of the yoke. I had upgraded her to the U bolt style yoke from the strap style while we were in there.

I then replaced the set up bearings on the carrier with new ones from the rebuild kit. I once again used my soft hammer to tap the carrier into the housing and torqued the cap bolts to spec. I rechecked the backlash and pinion wipe pattern with the new bearings. Nothing changed.

With everything in place, I left her put the new gasket on the newly pink diff cover. She bolted it up and filled the housing with oil. She then put up her drive shaft and skid plate.

A test drive indicated that the new gears ran nice and quiet. We then took it for a quick run in the woods and enjoyed the new crawl ratio.

[phpbay]dana 30 4.10, 10[/phpbay]

Jeep Speedometer Calibration

Jeep speedometer Calibration

When changing gears or even tire sizes, the speedometer calibration will change. Jeep Cherokees have a gear driven speedometer sensor even after the speedometer head was changed to electric. A gear dives a pulser unit that sends a signal to the dash.

The gear is mounted in the transfer case on the 4wd models. There are two different gears used. There is a short shaft gear used in the 1993 and later Cherokees and a longer shaft use dint he earlier versions. The long shaft version is the same gear used to drive the cable speedometers used since the 1970’s.

The gears have different tooth counts to provide different ratios to calibrate the speedometer. They are also color coded.

To determine the gear you need you can reference a chart of tire size and gear ratios like the one on Marcus Ohms site. You can also calculate the one you need if you have an accurate speed reference like a GPS or a measured mile.

To select the proper gear for Jennifer’s Jeep, I used a GPS to get a speed reference. I drove at several steady speeds and recorded the indicated speed on the speedometer and the actual speed given by the GPS. Note that most GPS units only update the speed every three seconds, so you have to maintain a steady speed to get an accurate reading.

In this case I found that the speedometer showed 70 when the GPS showed 57 MPH. 55 MPH on the speedometer showed about 45 on the GPS. This gave me a ratio of about 1.2 to 1.

Next I pulled out her drive gear to see what tooth count it was. The gear is held in place by a clamp and a single bolt. There are four different ways to turn the housing so pay attention to which slot is toward the bolt when removing the housing. You can count the teeth but the number is stamped o the gear as well. In her case is as 29.

29 times 1.2 gave 34.8 or rounded up to 35. This matched the chart on Marcus’s site so we set about finding a 35 tooth gear.

Prices vary widely for these gears. My supplier only stocked the short shaft so we had to look elsewhere. Surprisingly the cost from the Jeep dealer was very reasonable and about half the cost of many aftermarket venders. Jennifer was able to source a used on from Ebay for half that however.

Hers came from an AMC Javelin demonstrating the wide variety of cars and trucks that use these same gears. The 35 took gear is coded orange.

To install the new gear, I had to rate the housing to a different position. The gear tooth range for each position is clearly marked o the housing so it is just a mater of making sure it is aligned with the right slot.

Now she has an accurate speedometer reading for her 33” tiers and 4.10 gears.

[phpbay]jeep speedometer gear, 10[/phpbay]