1998 Chevy Pick up won’t start

1998 Chevy Pick up won’t start

My Dad called the other day to say that his Chevy Pick Up would not start. We began by checking the usual suspects, spark and fuel.

I used my inductive spark checker held to a plug wire and it indicated that we had spark. I put my hand over the exhaust pipe and it smelled like we had fuel. Hmm.

We tried the clear flood procedure even though it did not seem flooded. Still not start.

The next night I returned with my fuel pressure tester and timing light. We checked the fuel pressure and found 50 psi. We guessed that was enough even though the spec is 55 to 60.

We had noticed that the spark was intermittent on the tester which could have been form the way I was holding it or maybe from a bad cap or rotor. So dad bought a new cap and rotor to add to the new spark plug wires and air filter he had installed previously.

We tried to check the timing and could not find any marks on the damper. I hooked up our antique timing light anyway and found that it does a poor job of insulating the voltage from a modern high energy ignition system.

He called a mechanic friend of his who came over and hooked up the OBDII tester. The tester shoed no error codes and showed the timing to be correct. Glad to have our fears of a broken timing chain put aside. But it still would not start. His friend suggested that 50 psi was not enough fuel pressure to start the truck but I was doubtful.

I went back to help Dad move the truck to his shop so he could begin the process of removing the bed and swapping out the fuel pump. I checked to see if it might be a problem with the idle air control circuit but that seemed OK as well.

Once we had towed, tugged pushed and pulled the truck into place in the shop I decided to try one lat thing before I left. I poured some gas down the throttle body and sure enough it fired up. In fact it stayed running and ran just fine.

I went to hook up the fuel pressure tester again and the engine instantly died. I hooked it to the test port and again the engine would not start. We hit it with another splash of fuel and it started and again ran fine. Seems the low fuel pressure was not low enough to keep it form running but was low enough to keep it from starting when cool.

We tried it several more times and sometimes it would start without assistance but most times it would not. So Dad is now pulling the bed to swap the fuel pump.

Replacing valve cover gaskets on a Mercury Villager

Replacing valve cover gaskets on a Mercury Villager

This past weekend I helped a friend by replacing the valve cover gaskets on his Mercury Villager. Working on this engine reminded me of why I love Jeeps so much.

This is a sideways mounted V 6 engine. This means that the rear valve cover in under the firewall and behind the intake manifold. The intake is at least made in two pieces so you can take off the top part without having to remove it from both the heads.

Ed’s van was literary pouring oil out of the rear valve cover every time he headed up his steep driveway. Before diagnosing the problem, we thought it had to be a pressurized oil leak like the oil pressure sender or something due to the huge amount of oil it would leak.

However, close inspection showed the line of oil began and ended at the valve cover to head joint. Only the rear one. The front cover was not leaking.

This van is actually a re tagged Nissan Quest. I loved the old Nissan L series engines. They were extremely reliable and easy to work on. There were only a couple of special tools needed for the whole engine. And every part was easy to get to. Not so on this little V6.

From reading the internet forums, it seems common for the valve cover gaskets to fail at 100,000 miles. My Jeep engine has 330,000 miles on its original valve cover gasket. The old L series Nissans had a simple cork gasket that lasted me well over 100,000 miles.

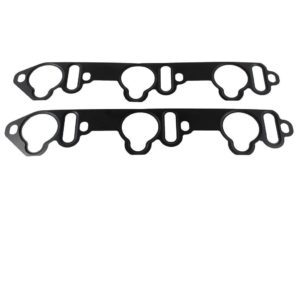
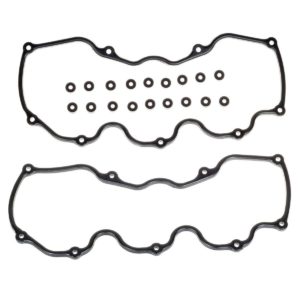
This engine, however, has a strangely shaped rubber gasket that cost $20 for the pair. The most expensive part of the job, however, was getting the intake gasket that only came in a set and cost $40. I only needed one of the gaskets from the set but it was not available separately except from the Nissan dealer. My nearest Nissan dealer is over an hour away.

The manifold at first seemed impossible to remove. There are two hard water lines attached to the bottom of the manifold that attaches via short hoses to pipes attached to the engine. You can’t access the clamps without raising the manifold and you can’t raise the manifold without disconnecting the hoses.

I finally figured out I could raise the right side of the manifold just enough to access the clamp and pull off the hose. Then I could work on the other one. I seriously considered cutting the hoses. But one is a specially shaped hose that I am sure is dealer only and who knows what it cost.

Also complicating the issue is that the EGR valve is connected the manifold by two L-O-N-G studs and to the exhaust by a hard metal pipe. The EGR valve won’t move much so you have to pull the manifold out of the valve on the long studs.

After pulling off the right hose, I could raise it enough to get the left hose off and then pull it loose from the EGR. That is after figuring out how to disconnect the vacuum line to the brake booster. There is also a hidden sensor wire that can only be disconnected while you hold the manifold up. Of course, there is no room to have anyone helping, so you have to balance it all in one hand and disconnect the wire with the other.

Luckily Ed’s van is dark red so the blood stains don’t really show much. There is a very sharp flange just under the windshield wipers that I hit my hand on as I was pulling loose the last of the lines.

Once the manifold was out of the way, the Valve cover is still not easy to get to. It is way back under the firewall and several of the screws required a stubby screwdriver to operate. Oh, I forgot to mention, the valve cover is not held by real hex head or even Torx bolts. It is held down by 9 number 2 Phillips screws!

I hate Phillips screws because you have to hold constant pressure down on the screwdriver while turning to prevent stripping out a tight fastener. This is very difficult to do while stretched over the engine compartment on fasteners you can’t see.

Once the screws were out and the crankcase vent line disconnected, I was able to pull the valve cover. It simply fell off as the gasket was completely degraded. There were two spits in the gasket that allowed oil to simply run out from under the cover. The remaining part of the gasket crumbled as I removed it from the cover. The new gasket was very flexible and much thicker showing just how the old one had degraded from the heat.

Thankfully cleanup of the head was as easy as wiping with a rag because it would have been next to impossible to get a scraper in there to clean up any stuck gasket material.

With the rear cover back in place, I focused on the front cover which was not leaking but I knew would have the same degraded gasket. Besides, there were two in the kit.

This one looked like it would be a breeze to remove as you can look straight down on all eight screws. Wait a minute! The rear cover had nine screws? After removing the eight screws, the cover was still attached. Careful inspection showed there was a ninth screw. It was under the distributor!

Not under the distributor cap but under the distributor itself. This means that you have to completely remove the distributor from the engine taking a chance on changing the ignition timing.

Thankfully someone had made a nice paint mark on the distributor earlier so I could tell exactly where to put it back. I failed, however, to mark where the rotor pointed before pulling with great force to break the seal of the O ring on the distributor housing. The distributor popped up and of course, twisted as the helical gears disengaged from the cam. I marked where I thought it had been and continued.

The front cover was much easier to remove and clean after the distributor and the knock sensor was removed than the rear one had been.

I cleaned it up and put it all back. I carefully aligned the rotor with my mark and the distributor with the previous mark.

Next came the seemingly impossible task of replacing the intake. The two hoses and the EGR valve all seem to have to be connected at once and at three different angles.

After several trial fits, I figured out that the only way to make it work was to slip the EGR part way on the studs, then connect the left hose and then the right one. The trouble was once all that was accomplished there was no way to put the spring clamp on the first hose. I needed a longer pair of pliers than I had in my toolkit to accomplish the task.

I eventually replaced the spring clamp with a worm drive clamp so that I was able to tighten it through one of the little gaps in the manifold using a nut driver. It looked like it was all going well until I noticed that the sensor wire was not connected and it need to have been connected before I sat the manifold down. After much work, I was able to fish the wire under the manifold and eventually connect it to the connector on the back of the engine. I added a bit more blood to the underside of the cowl in the process.

With all the hoses connected I finally was able to slide the EGR valve home and tighten the nuts. Then I began the process of hooking back up all the other wires and vacuum lines that connect to the throttle body and idle air control valve.

I finally got the intake airlines reconnected and the manifold bolts tightened and it looked ready to crank when I noticed I had forgotten to put the mass air flow sensor back in. It just clips in place and I had only removed it to help get my arm in behind the engine.

At that point I had my assistant try to start the engine. The engine would turn over but felt like it was trying to backfire. It would hardly turn with the starter.

At this point, I remembered the rotor position was not certain so I pulled the distributor again and moved the rotor one tooth. I put it all back and had my assistant try the key again.

This time it started and ran perfectly. There was much rejoicing as we let it idle and warm up to check for water leaks. Finding none, we drove it back to Ed who was very happy to have his van back.

How to Replace the Water Pump in a Jeep Cherokee

A leaking water pump can quickly damage the otherwise very reliable Jeep Cherokee Engine. The water pump can be changed by a home mechanic with some patience and ordinary hand tools.

When the Jeep Cherokee water pump seal fails, it will leak from the weep hole in the bottom of the pump. Since this hole is behind the pulley, it is often hard to see where the fluid is coming from. Often a water pump leak will be misdiagnosed as a leaking hose as the fluid runs down and drips off the bottom of the hose.

Begin by letting the Jeep cool. Remove the radiator cap and make sure there is no pressure in the system.

Remove the electric fan. It unbolts from the header at the top and the bottom sits in two tabs at the bottom of the radiator.

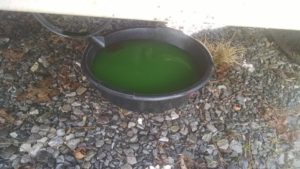
Place a pan under the Jeep to catch the anti freeze and remove the lower radiator hose. Let the system drain. Next, remove the heater hose from the tube attached to the water pump. Be careful with the tube as you will have to reuse it.

Break loose the four bolts that hold the pulley to the water pump but do not remove them. If the tension on the belt does not hold the pulley from turning, use a square section screwdriver between two bolts to hold it while breaking loose each bolt.

Remove the tension of the belt at the power steering pump. On the earlier versions, the whole power steering pump moves. On later ones, there is a separate adjuster pulley. Move the belt out of the way.

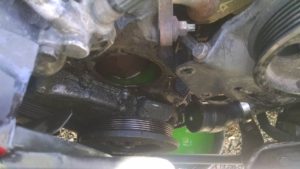
Finish removing the bolts and remove the pulley. Now you can access the four pump mounting bolts. These have half inch heads, not 13mm and one bolt is longer than the others.

Remove the two bolts that hold the power steering pump bracket. These are 15mm on some and 9/16 on others.

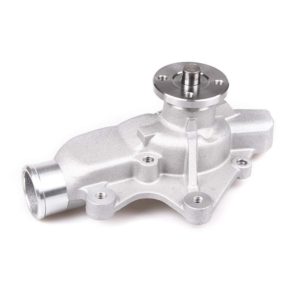
Now pry the pump away from the block. If this is an original water pump, there will be a pry tab on the top of the pump by the metal pipe. Many aftermarket pumps do not have this pry tab.

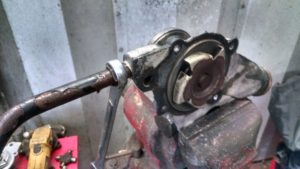
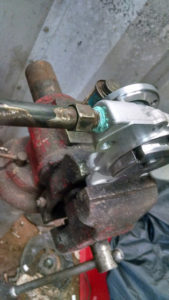
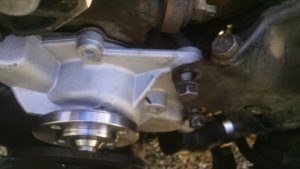
Twist the pump out from under the power steering pump bracket and carefully remove it from the Jeep. Place the pump in a vise and remove the metal pipe noting its orientation.

Put some thread sealer on the threads and install the pipe in the new water pump. Turn it until it is aligned the same as the old one was. It should stick straight back from the impeller.

Use some sticky gasket sealer like permatex to hold the gasket on the water pump.

Clean the front surface of the block down to bare metal. This is probably the most time consuming part of the whole job. Use a scraper and some chemical gasket remover if needed. The block is cast iron, so you can be aggressive when scraping.

Twist the new pump into place under the power steering pump bracket and seat it into place. one of the bolts goes into the water jacket so just to be safe I like to put pipe dope on all the bolts to seal them.  Install the four mounting bolts that secure it to the block. Tighten them evenly.

Install the two bolts that hold the pump to the power steering bracket. Install the pulley using a screwdriver to hold the bolts while you tighten them. Make sure the pulley seats squarely on the flange and does not wobble when you spin it round.

Install the belt and set it to the proper tension. Reinstall the lower radiator hose and tighten the clamp. Leave the upper hose off for the moment.

Fill the system with a mixture of antifreeze and water appropriate for your climate. I use 50/50. Fill until the fluid comes out the heater hose or the metal line. Reinstall the hose and continue to fill the system. Most Jeeps hold about two gallons when the water pump is removed.

Check for leaks and then install the electric fan. Tilt it into place and engage the lower tabs. Then install the two bots at the top. Connect the control wire.

Start the engine and check the belt tension and check for leaks. Recheck the coolant level after the engine has been heat cycled.

11:11

11:1111:11

I seem to be noticing a lot of number patterns lately. As I talked about in a previous post, I see 12:34 a lot.

Just the other day I was working on a friends truck and the clock resets every time truck is started. When I went to shut it off it read 12:34.

But I am also seeing 11:11 often now as well. I also see other variations. Like this morning I work up form a dream and looked the clock. It said 4:44.

Look at my score from car town in the photo above. It is 1111.1.

Steve Pavlina has written about 11:11 and there is a facebook group that talks about things related to 11:11.

I am sure that 11:11 means different things to different people, but to me it seems to indicate that i am on the right path. I try to notice what I am thinking about and how I am feeling when I notice 11:11 on the clock or on some other counter. Usually I notice it when I am feeling happy and free. It seems that if I am anxious or worried I will see it before it gets there like 11:07 or something. If I am feeling sad or overwhelmed, I often miss it and see 11:13 or so.

Proverbs 11:11 Through the blessing of the upright a city is exalted,
but by the mouth of the wicked it is destroyed.

This reminds me that words are very powerful. If we speak blessings, our “cities” will be built up. However if we speak words of doom and gloom, our “cities” will be destroyed.

What are your thoughts on 11:11 and 12:34? Please share them in the comments below.

Note that this was written on 10/01/10

The Red Jeep Saga – Update

The Red Jeep Saga – Update

Scott has now taken possession of the Red Jeep Cherokee Limited. He reports that it is running well and he has scrapped plans to sell it and is now planning to keep it as his daily driver replacing his XJ Wagoneer.

He is in the process of sanding it down so he can repaint it. I think he is even planning an ambitious color change. A color change on a Cherokee requires a lot of attention to detain to get it right. My off road Jeep used to be purple and is now white but it is easy to see the purple interior when it is not covered in mud.

Changing the color on the red Jeep will require pulling all the door panels and painting the door jambs as well as the hatch and under hood areas. Lots of labor and masking tape will go into this project.

One last electrical glitch has been sorted out. The light in the clock would not work. After tracing the wiring, it turned out to simply be a bad bulb. Now the clock is visible again.

It is amazing that this Jeep that I thought would never run again now drives and runs better than some of the newer Cherokees in our collection.
[phpbay]jeep cherokee, 10[/phpbay]