How to replace the track bar on a Jeep Cherokee

How to Change the track bar on a Jeep Cherokee

The track bar locates the front axle side to side on a Jeep Cherokee. The stock bar consists of a rubber bushing at the axle end and a tie rod end at the frame joint. The frame end joint generally wears out first.

To determine if the track bar is bad, hold your hand on the frame end joint while an assistant turns the steering wheel back and forth. Any movement here means the bar is bad.

To replace the bar begin with the vehicle weight still on the axle. Locate the steering so that the 15mm head bolt that fastens the track bar to the axle is accessible. Remove the bolt. There is a special nut with a tab on it behind the axle. Pull it out after the bolt is free.

Now lift the vehicle to a comfortable working height. Remove the cotter key from the mounting bolt. Use a ¾ inch box end wrench to loosen the nut. Do not remove it completely at this time. Run it up even with the top of the bolt.

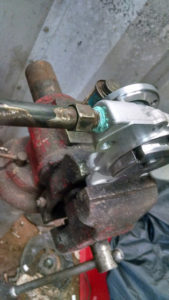
Use a tie rod end removal tool to press the tapered link out of the frame mount. My favorite is the pesto tie rod puller from JC Whitney    ( Since that tool is no longer available try this one from Amazon) that accesses the joint from the side. Hammer the puller between the bar and the mount. This will likely damage the rubber boot. Put a moderate amount of pressure on the puller by tightening the bolt on the puller.

Then use a hammer to hit the frame bracket. Hit it hard. The idea is to temporarily deform the tapered hole enough to loosen its grip on the pin. When the bar pops loose, the puller will likely fall so watch your toes.

Remove the nut the rest of the way and remove the bar. Clean the tapered hole.

On the new bar, note the location of the cotter pin hole. Be sure it is rotated in a way that will allow you to put in a new pin once it is installed in the cavity.

Slip the tapered pin into the hole. Tighten the nut. Align one of the castle nut opening s with the hole in the pin. Insert a new cotter key and bend it back over the top of the pin.

Lower the Jeep to put weight back on the axle. Fit the axle end of the bar in the bracket and align the hole. The easiest way to align the hole is to have an assistant turn the steering wheel while you line up the bolt with the hole. Alternately you can push or pull the Jeep side to side to line up the holes.

Slip the bolt in and hold the special nut up behind it and carefully start the threads. Run the bolt in but do not tighten it fully. Bounce the Jeep a few times to settle the bushing in place. Then tighten the bolt.

Grease the frame end joint if it is fitted with a grease fitting.


Tie rod removal tool

Jeep 4.0 Oil filter adapter leak

Jeep 4.0 Oil filter adapter leak

Jeep Cherokees and other Jeeps that use the 4.0 are subject to a leak on the side of the block where the oil filter adapter attaches. There are three O rings inside that with age will leak.

Often this leak is misdiagnosed as a rear main leak or even a valve cover gasket leak. When the oil filter adapter leaks oil is blown back and collects on the rear of the engine.

The proper O rings are available in a kit from your local Jeep dealer or form a Crown Automotive distributor. Standard O rings do not seem to fit, so you need to get the proper rings from the kit.

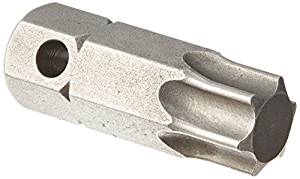
There are two different types of oil filter adapters used throughout the run of 4.0 blocks. One has a 5/8 hex on the surface. The later version has a T60 torx in the end.

Removal of the older hex version is pretty straightforward. Just turn the hex with a wrench and remove the adapter.

Removal of the later Torx version is more difficult in that there is not enough room to put a normal torx bit in the opening and still be able to put a racket on it. One method to gain clearance is to remove one of the bolts that hold the engine mount to the body. Getting this bolt head out of he way will give just enough clearance to put a 3/8 ratchet or breaker bar on the torx bit. As the center unscrews, you will run out of room before the part is all the way out.

One way to deal with the lack of clearance is to use a torx bit that can be fit in a box end wrench. Or you can make a special tool for the job by welding the torx bit into a box end wrench.

When the O rings are hardened, it takes a lot of torque to break it loose initially and there is a lot of friction all the way out until it comes loose. If you make a wrench, be sure to make it strong.

Once the adapter is off the block, you will need to remove the old O rings. If it was leaking, then they will likely be hard like bakelite. The big one often sticks to the bock. Scrape it loose or free it from the O ring groove depending on where it ends up.

The two on the center bolt are best removed using a dental pick. Coat the new ones in oil to slip them in place. Make sure they are seated in their grooves and not twisted when in place.

Set the adapter back up on the block. Align the roll pin with the groove in the adapter to ensure the proper clocking of the adapter.

Carefully start the center bolt into the bock and tighten securely. It does not have to be as tight as it was when it came off. It was stuck by the old O rings then.

Check the oil level, as you will likely have lost what was in the filter. Start the engine and check for leaks.

T60 bit can be turned with a wrench   https://amzn.to/2rrE454

Dick Cepek Crusher Tires on Jenny’s XJ Jeep Cherokee

Dick Cepek Crusher Tires on Jenny’s XJ Jeep Cherokee

In order to get a bit more off road capabilities, Jenny decided to go up a couple of tires sizes. She ordered a set of Dick Cepek Crusher tires from Tire Rack after reading many reviews and considering factors such as shipping time and customer service. To read more about her decision making process see her blog post at: http://thejeeptalks.blogspot.com/2010/11/dick-cepek-crusher-tires.html

The Dick Cepek tires have a very interesting tread pattern in a dog bone shape. The side lugs are in the shape of a skull and cross bones. The tread has a huge void area that makes for good traction in mud and rocks and self cleans quickly. The lugs are also siped for improved wet traction on pavement.

The tires arrived quickly from Tire Rack and were delivered by my friendly UPS driver who was kind enough to off load the very heavy tires in front of the shop door.

Mounting them on the rims with my manual tire changer proved to be a challenge due to the heavy sidewall construction. It was difficult to compress the tire enough to get it to slide into the drop groove on the rim. In fact, we got only three mounted before the concrete anchors that held the machine to the floor failed. I had a local tire shop do the last one and I noticed even his fancy pneumatic tire machine had a little trouble pushing on the last part of the bead.

While I was mounting the tires, Jenny worked on opening up her fender wells to accommodate all that rubber. The stock flares were removed and the flange was folded under to make a smooth surface in case the tires did contact the body work.

In the front, the bump stops were also extended an inch and a half with spacers mounted to the bottoms of the coil spring perches. The tires looked great mounted on her black Cragar steel wheels.

On the road the tires are surprisingly quiet. The road feel is fantastic and they are very smooth running. The tires required very small weights to balance which surprised me considering the total amount of rubber on them.

On the trail, they showed their value right away. She first aired them down to 15 psi. They did a fantastic job of getting her up the very muddy class III and IV trails in Harlan, Ky. The sidewalls still looked very stiff over rocks however so on day two she dropped the pressure more to 11 psi. I was pretty sure that as stiff as the sidewalls were there was little danger of them popping off the rim.

In the infamous Lower Rock Garden the tires did a fantastic job of gripping the rocks. The skull shaped side lugs that I had thought were mostly for show gripped rocks like glue. At one point the only thing holding her to a rock was the side lug and as she drove forward the tire went up the rock instead of slipping off. And this was in wet snowy conditions.

She was very happy to make her first successful run through the Lower Rock Garden. The new tires worked great.

Also on one very muddy climb where the only trucks that had made it up ahead of her were running Swampers, she made a quick mud slinging run and made it all the way to the top in one pass. The deep bone shaped lugs dug in and cleared out just as they were needed to make it up the twisty climb. I think she embarrassed some of the guys running BFG’s in that she made it look easy to climb the hill.

As we were leaving on Sunday, she aired them back up to 30 psi for the trip home. Even at interstate speeds, the tires ran smooth and quiet. The Dick Cepek Crusher tires proved to be very tough and versatile. They handled everything she threw at them: rocks, mud gravel and pavement with equal ability. Hopefully the tread life will be as great as the traction and she can enjoy them for a long time to come.

Dick Cepek Crusher Tire

Dick Cepek Crusher Tire

Dick Cepek Crusher Tire priced from $167.


How to Replace the Water Pump in a Jeep Cherokee

A leaking water pump can quickly damage the otherwise very reliable Jeep Cherokee Engine. The water pump can be changed by a home mechanic with some patience and ordinary hand tools.

When the Jeep Cherokee water pump seal fails, it will leak from the weep hole in the bottom of the pump. Since this hole is behind the pulley, it is often hard to see where the fluid is coming from. Often a water pump leak will be misdiagnosed as a leaking hose as the fluid runs down and drips off the bottom of the hose.

Begin by letting the Jeep cool. Remove the radiator cap and make sure there is no pressure in the system.

Remove the electric fan. It unbolts from the header at the top and the bottom sits in two tabs at the bottom of the radiator.

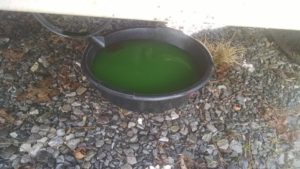
Place a pan under the Jeep to catch the anti freeze and remove the lower radiator hose. Let the system drain. Next, remove the heater hose from the tube attached to the water pump. Be careful with the tube as you will have to reuse it.

Break loose the four bolts that hold the pulley to the water pump but do not remove them. If the tension on the belt does not hold the pulley from turning, use a square section screwdriver between two bolts to hold it while breaking loose each bolt.

Remove the tension of the belt at the power steering pump. On the earlier versions, the whole power steering pump moves. On later ones, there is a separate adjuster pulley. Move the belt out of the way.

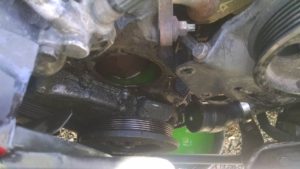
Finish removing the bolts and remove the pulley. Now you can access the four pump mounting bolts. These have half inch heads, not 13mm and one bolt is longer than the others.

Remove the two bolts that hold the power steering pump bracket. These are 15mm on some and 9/16 on others.

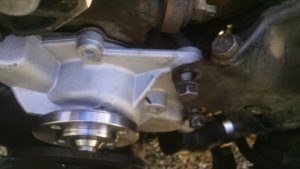
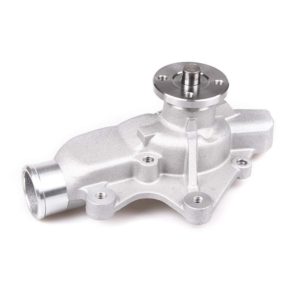
Now pry the pump away from the block. If this is an original water pump, there will be a pry tab on the top of the pump by the metal pipe. Many aftermarket pumps do not have this pry tab.

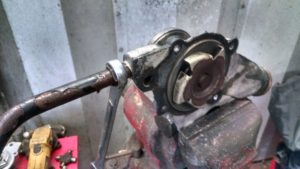
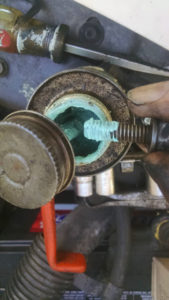
Twist the pump out from under the power steering pump bracket and carefully remove it from the Jeep. Place the pump in a vise and remove the metal pipe noting its orientation.

Put some thread sealer on the threads and install the pipe in the new water pump. Turn it until it is aligned the same as the old one was. It should stick straight back from the impeller.

Use some sticky gasket sealer like permatex to hold the gasket on the water pump.

Clean the front surface of the block down to bare metal. This is probably the most time consuming part of the whole job. Use a scraper and some chemical gasket remover if needed. The block is cast iron, so you can be aggressive when scraping.

Twist the new pump into place under the power steering pump bracket and seat it into place. one of the bolts goes into the water jacket so just to be safe I like to put pipe dope on all the bolts to seal them.  Install the four mounting bolts that secure it to the block. Tighten them evenly.

Install the two bolts that hold the pump to the power steering bracket. Install the pulley using a screwdriver to hold the bolts while you tighten them. Make sure the pulley seats squarely on the flange and does not wobble when you spin it round.

Install the belt and set it to the proper tension. Reinstall the lower radiator hose and tighten the clamp. Leave the upper hose off for the moment.

Fill the system with a mixture of antifreeze and water appropriate for your climate. I use 50/50. Fill until the fluid comes out the heater hose or the metal line. Reinstall the hose and continue to fill the system. Most Jeeps hold about two gallons when the water pump is removed.

Check for leaks and then install the electric fan. Tilt it into place and engage the lower tabs. Then install the two bots at the top. Connect the control wire.

Start the engine and check the belt tension and check for leaks. Recheck the coolant level after the engine has been heat cycled.

Electric Fan Override Switch Jeep Cherokee

On the last couple of off road outings, I have had some trouble with my Jeep Cherokee overheating. Normally this Jeep has performed well with respect to heat so this was a surprise to me.

For some reason, the coolant temperature switch was not bringing in the electric fan. Also, since I have disconnected the AC, I could not force it on by turning on the AC compressor.

To get me through the day of wheeling, I ran a wire from the battery to the fan so that it ran all the time. While this kept me cool, it was inconvenient to have to open the hood and disconnect the wire every time I stopped for any length of time.

Back at home, I wired up the jumper through a switch on the dash so I could easily control the fan. I connected the hot side directly to the positive battery terminal and the other side I spliced into the red wire going to the fan.

Splice into the fan wire

New switch on the dash for the fan

This switch will cause the fan to run even with the engine off. It also bypasses all the relays and other parts of the circuit that might give trouble. The drawback is that the full fan current has to go through the switch.

In order to have a more convenient way to power up the fan when before the temp switch kicks in, I also modified the AC control circuit. This circuit also brings in the fan when the compressor clutch is engaged. Since my AC is long gone, but the compressor is still there, I unplugged the clutch power and put a jumper in the low freon switch. So if I switch on the AC, the radiator fan will run. This way, I can have the fan switch on and off with the engine.

Low freon switch jumper and AC compressor unplugged