
How I replaced the engine in my 1991 Jeep Cherokee.

My old XJ has served me well for nearly 500,000 miles. The odometer stopped working at 444444 and I have swapped clusters a couple of times, so I really don’t know what the current mileage is.
I have had an odd noise that sounded like a bad main bearing, but the engine ran well so I kept driving. I also had oil pouring out of both the front and rear crank seals. So, I knew I would at least have to drop the oil pan soon to repair those.
After pulling the old engine apart and making some measurements, I decided to get a remanufactured engine from Autozone. Amazon also sells the same engine.
My old engine bores were worn to the point that I was concerned if a .040 over bore would be able to clean them up. They were smooth, but very worn. There was the biggest ridge at the top I have ever cut out of an engine. My rod bearings looked pretty good, but the crank measured some wear also. After adding up all the parts I would need and factoring in the machine shops costs and my time to clean and transport all the parts, I decided to just buy a remanufactured engine.

The story of picking up the new engine and unboxing is told here:
http://mikestrawbridge.com/blog/2019/03/new-4-0-engine-unloading-and-unboxing/
I then set about adding the missing parts. I had planned to reuse my harmonic damper but I managed to crack it removing it from the old engine. So, I bought a new one. (Amazon link)

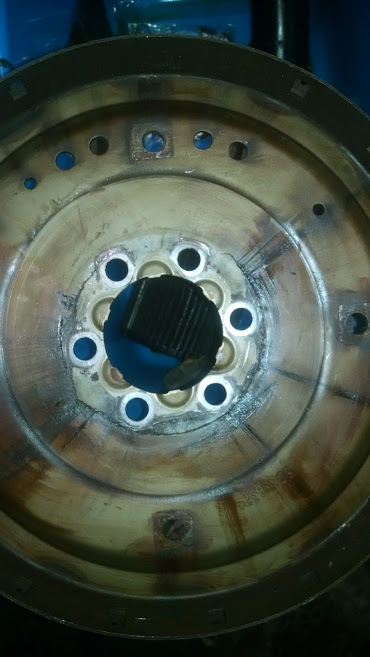
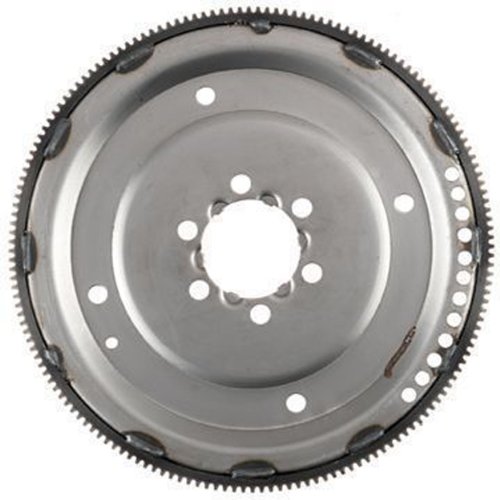
I found the source of my knock was the flex plate. It was very nearly broken in two. So I bought a new one of those. (amazon link)
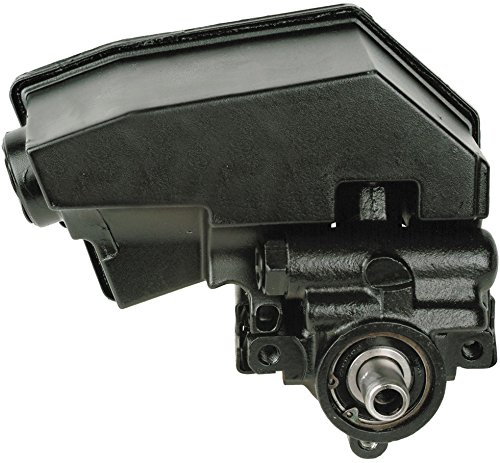
I got a new water pump from Autozone just to save cleaning the old one. I replaced my leaking power steering pump with a new one including a new tank. (amazon link)
While all the brackets were off, I cleaned and repainted the steel ones. I reused my old alternator, AC compressor and ignition coil.
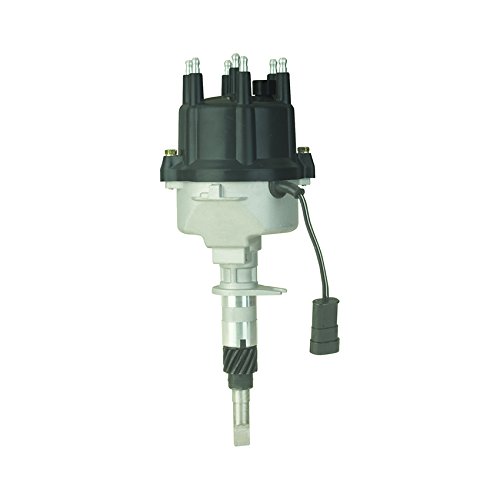
I also purchased a new distributor. More on that later. (Amazon LInk)
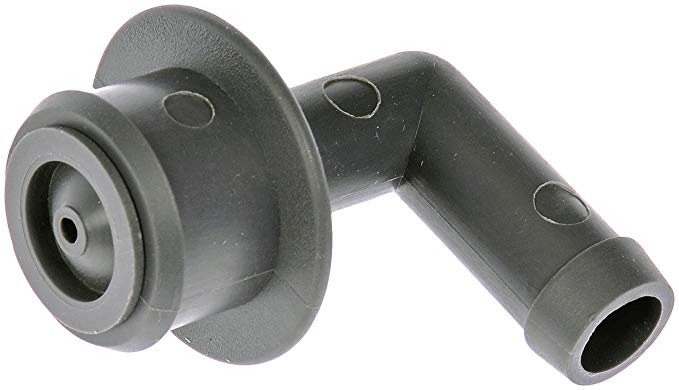
The engine came with new timing cover, valve cover and oil pan. SPO that saved me a lot of cleaning and repainting. However, the holes for the crankcase vents in the cover are different so I had to order different vent connectors. (amazon link)
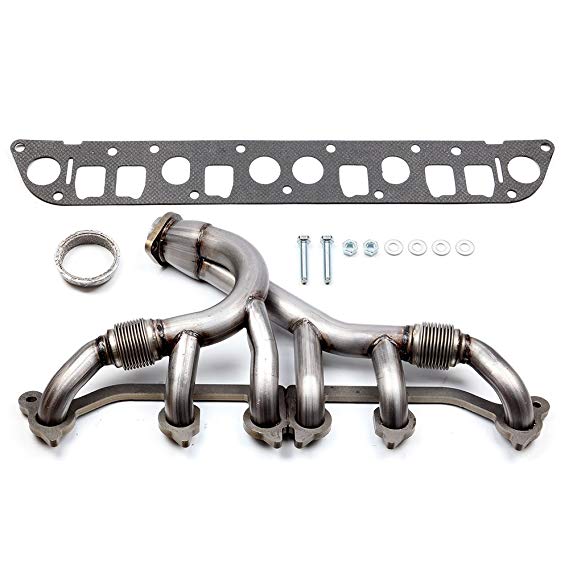
I inspected my stainless header and found several cracks. Rather than rewelding them, I swapped back to the original style but got one with the expansion joints that are supposed to reduce cracking. (amazon link)
I cleaned and reused my intake and relatively new injectors. I also reused the CPS, TPS and IAC.
Before installing the manifolds, I used a Dremmal to clean up some of the casting flash on the head and on the intake ports. Not a full gasket match porting but just a little clean up.

I also used a white paint marker to make a nice bright timing mark on the new front pulley. I rotated the engine around until both the valves were closed and set the engine at TDC. I then installed the intake and exhaust manifolds with the engine still on the stand.

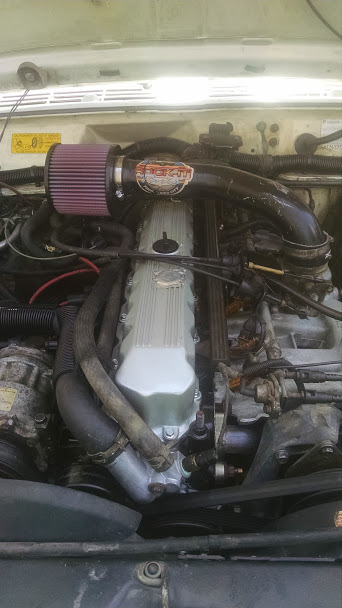
I installed all the pulleys and accessories on the engine except the clutch fan. I figured I would need the space to get the engine back in the Jeep. I left the belt a little loose since I could not properly tighten the fan pulley in place.
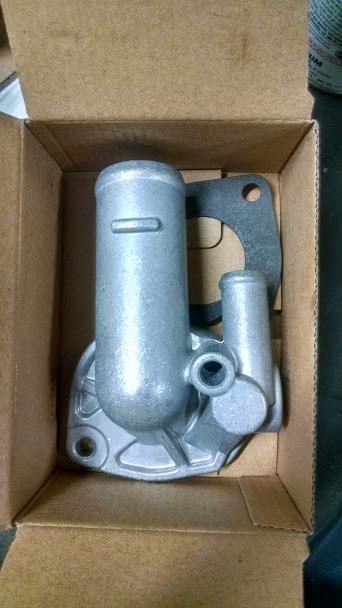
Instead of trying to clean the thermostat housing I bought a new one. (amazon link) I also installed a new thermostat. (Amazon Link)

I cleaned up the oil fitter adapter and installed new O rings and new WIX filter. The O rings were included in the engine kit.

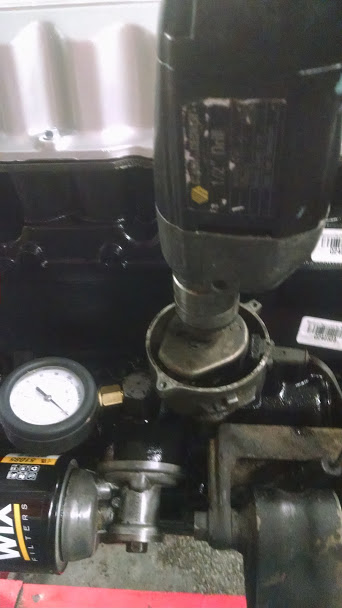
Before installing the distributor, I used an old distributor to make an oil pump rotating tool. I simply removed the drive gear from an old distributor. I dropped it into the hole and used an electric drill to spin the pump. I was surprised at how much power it took to spin the pump once it primed. I temporarily replaced the oil pressure sending unit with a gauge, so I could monitor the pressure during the priming process.
I then set the distributor in place with the engine still set at TDC. I then installed new spark plugs and connected new wires in the firing order.

I then installed the engine into the Jeep engine compartment reusing my old motor mounts. I let it tip back and disconnected the hoist.
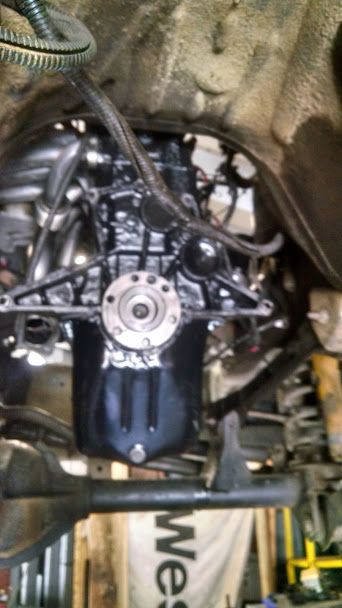
I raised the Jeep up and installed the new flex plate. I used a pry bar through one of the balancing holes to hold while I torqued the crank bolts to the 105 ft lb. spec.
I then assembled the transmission and transfer case as a unit and installed them together. Once the crossmember was back in place, I installed and torqued down the converter to flex plate bolts. The engine compression was nearly enough to hold the plate from turning but I wedged a screwdriver in the starter teeth to hold the plate while torqueing. Lining up the first hole was tricky, but I finally got it by turning the engine with eh crank pulley bolt.
I then installed the cover plate and starter. Next, I reinstated the transmission lines and the exhaust. I then reinstalled the AC condenser and radiator. I left the engine dry and the heater hoses out of the way for the first start.
I then connected the transmission lines, power steering lines and fuel lines. I added some transmission fluid and some power steering fluid so these pumps would not run dry at start up.
With the front of the Jeep lifted, I cycled the steering from lock to lock several times to clear the air that have entered the system with the hoses off. I topped the pump reservoir back up.
I installed the battery tray and battery and connected the cables. I added a new custom battery hold down clamp from Dirt Bound Off road.
I set the fan shroud and clutch fan in together and attached the fan to the pulley. I then set the belt tension. I then installed the plate over the radiator and attached the shroud. I left the electric fan out to help check for leaks.
The first start turned into quite a puzzling trouble shooting exercise. More on that here: http://mikestrawbridge.com/blog/2019/04/jeep-4-0-no-start-troubleshooting-puzzle/