I finally pulled the crank and corrected the rod knock I have been ignoring for years in my Renix stroker motor.
I have been running a 4.7 stroker in my 1988 Jeep Cherokee XJ for over 13 years now. I like the extra torque it gives; me especially with having 3.55 gears and 33-inch tires.
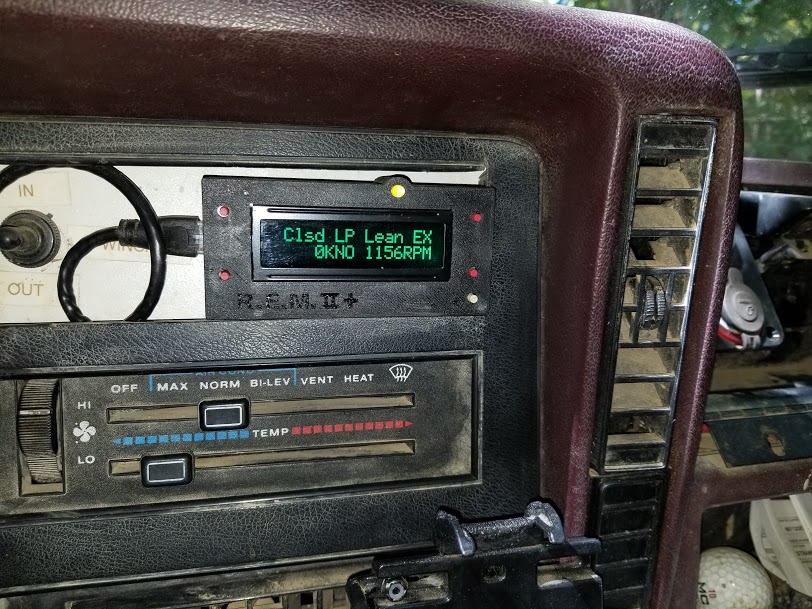
I have had a slight knock for years that has gotten worse. It was so bad that it was showing up on the REM knock sensor readings and retarding the timing.
I had been told it was everything but a rod knock, but my dad and I both thought it sounded like a rod knock. So, I finally pulled the oil pan and took a look at one of the rod bearings. As I suspected, it was coppered. And the journals looked rough.
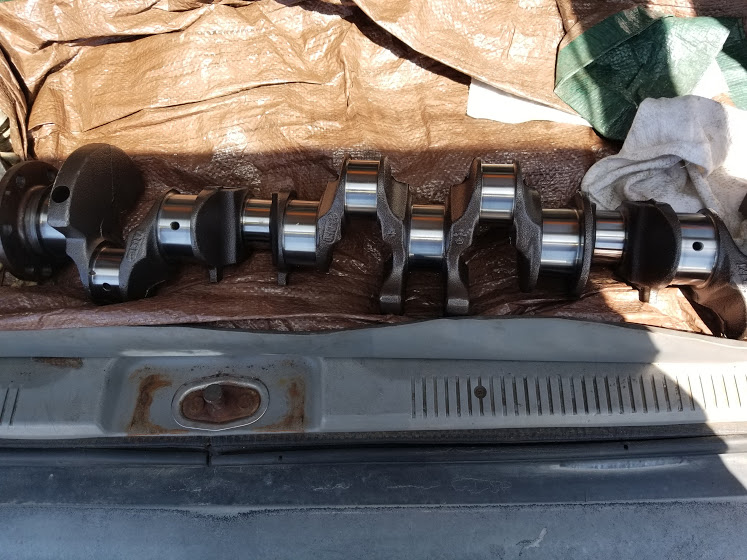
I checked the mains and they looked ok. So I tried putting in a new set of rod bearings. That lasted about an hour before the knock was back. So I pulled the engine so I could remove the crank.
I sent the crank to the machine shop and had it ground. It came out at 40 under on the rods and 20 under on the mains. I had a little trouble finding bearings that size. Most places showed them out of stock. I eventually found some Clevite bearings on eBay. BTW, there is a difference in the main bearings for a Renix era AMC block and a Mopar block. The rod bearings are the same for both vintages.
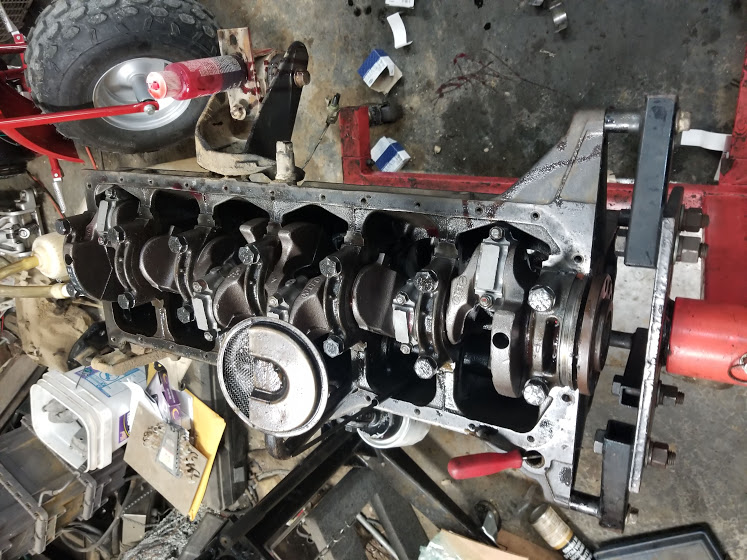
When reassembling the main bearings, I noticed that the caps had been previously installed out of order. There are numbers cast into the caps that show their position. Hopefully, the block was not align bored with caps in the wrong order because I put them back as numbered. We shall see how this works out.
Since there was no visible wear in the cylinder liners, I elected to not change the rings. I left the pistons in the block during the entire process.
While I had everything apart, I decided to upgrade and relocate the alternator. I used the eBay kit, Note this kit requires a later model alternator. I upgraded to the Dodge RAM alternator. https://amzn.to/2O2cNCR. I had to use a later model AC support as well to make the kit work. The later alternator requires an external regulator. I used https://store.alternatorparts.com/hd-external-voltage-regulator-conversion-kit.aspx
I also decided to update to the new style radiator with a cap and delete the heater control valve. I have already partially deleted the valve but kept the T going to the pressure bottle. See my previous article for the heater hose part numbers. http://mikestrawbridge.com/blog/2019/04/heater-valve-delete-jeep-cherokee-xj/
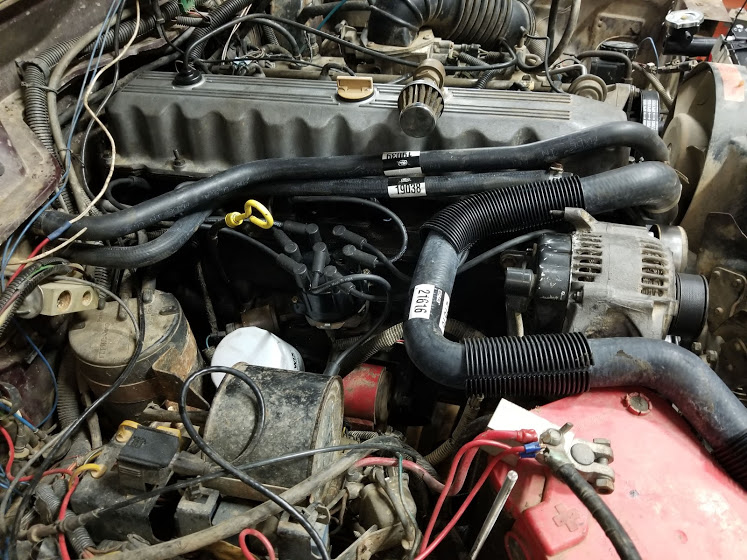
I used an Autozone A1193 radiator. I chose this one because it has a port for the electric fan switch from the old radiator. I had to get a new radiator cap to match. https://amzn.to/32HC2OK
In order to make the hoses fit properly, I also changed the water pump tube. I used the Dorman 56398 Water Pump Inlet Tube https://amzn.to/2QgeJKM. This made the later hoses fit nicely.
I used a Sealed Power gasket set for this rebuild. https://amzn.to/3041ZLu. I substituted the later oil pan gasket, however. https://amzn.to/2O89lGS The one-piece Felpro is not only easier to install, but it is also reusable and less likely to leak than the multi-part original gasket.
With the head bolted down, I modified an old distributor by removing the drive gear. I chucked this in a 1/2 in drill and used it to spin the oil pump. I put a gage in the port for the oil pressure sensor so I could monitor the progress. I kept the pump spinning until I saw oil come out the pushrods. This made sure the engine was pre-lubricated before starting.
I am starting up on high zinc racing oil to help coat the bearings during break-in. https://amzn.to/2NloCEm I used a WIX filter. https://amzn.to/32M4G1b
I installed new plug wires. https://amzn.to/2Qhcff7 And new spark plugs. Champion RC9YC gapped to 0.035.
I installed the engine on the motor mounts. I then attached the flywheel and clutch. I reused the originals as they all looked good even with 13 years of wear on them. Apparently my clutch slipping while rock crawling has not been as bad on the disk as I expected.
I then attached the transfer case and put the cross member back in place. I filled the transmission through the shifter hole before remounting the shift lever. I installed the drive shafts and topped up the transfer case fluid.
It took a few seconds for the fuel system to prime but once it did, the engine started and ran nicely. No knock registered on the REM.
Note: I learned something interesting about the Renix controller while working with the alternator swap. The controller does not like to go into closed loop without the alternator charging. I was able to get it into closed loop using an external battery charger. The battery seems to have plenty of voltage, but the controller was not happy without the system charging.
The Idle was too high and the Rich vs Lean on the O2 sensor as off. I could smell gas coming out the pipe and the sensor still showed Lean. Once I got the alternator hooked up and the voltage regulator tuned, the controller went into Closed-loop as expected and the idle settled down as usual.
I made my first test drive on the trails today and the old engine seems to run great. It was nice to cruise along on the trails and not hear the rod knocking. And the REM showed very little knock. Not the 128 number it was showing before the rebuild.